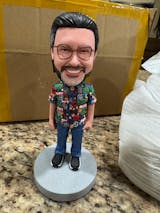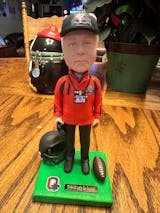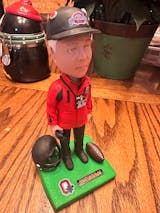
How to Repair Bobbleheadcraft Polymer Clay Bobbleheads at Home?
PennyDengShare
Have you ever picked up your favorite bobblehead only to notice a tiny crack or broken piece? It’s a sinking feeling—especially when the figure carries sentimental value or was given as a special gift. The good news is that most damage isn’t the end of the road.
In this guide, we’ll share easy DIY fixes for polymer clay bobbleheads—from reattaching tiny broken parts with 502 super glue to smoothing chips and even addressing a stubborn spring. With just a few tools and a little patience, your bobblehead will be wobbling happily again. For those who prefer visuals, Bobbleheadcraft has many short video tutorials on our YouTube channel that demonstrate how to fix minor damages step by step.
1. Assess the Damage Carefully
Before starting any repair, examine your bobblehead under good lighting. Identify the type of damage: small chip, detached piece, or a mechanical issue like a sticky spring. Cleaning the area gently with a soft brush or cloth removes dust and ensures any adhesive or putty bonds properly. Take note of fragile areas nearby so you don’t accidentally damage them during the repair. Proper assessment helps you choose the most effective repair method and avoid extra frustration.
2. Reattach Broken Pieces
Most minor cracks or broken parts, such as fingers, hair strands, or small chips, can be quickly and easily repaired using 502 super glue, which bonds polymer clay effectively and dries fast.
Repair Steps:
•Clean both surfaces thoroughly to remove any dust or residue.
•Apply a very small drop of 502 super glue; a tiny amount is better than too much to avoid overflow.
•Hold the piece in place gently but firmly for 20–30 seconds.
•Allow several minutes to fully cure before handling.
💡Tip: Bobbleheadcraft’s YouTube short videos show reattaching broken pieces, making it easy to follow along. You can also get creative and try your own repair methods for unique solutions. Patience is key—small adjustments over time often work better than forcing a piece into place.

3. Fill Gaps or Replace Missing Parts
When your bobblehead suffers from cracks, chips, or even missing fragments, different repair approaches can restore its charm:
For small gaps or chips
Use epoxy putty to fill the space and provide extra support. Once it has fully cured, sand the area lightly to smooth out any uneven surface. A thin touch of acrylic paint will conceal the repair and make it blend seamlessly with the surrounding details.
For completely missing parts
If a piece such as a hair tip, tiny finger, or decorative accessory is gone, sculpt a replacement using polymer clay or epoxy putty. After curing, sand the new part gently to match the original shape and texture. Before painting, lightly wipe the surrounding area with a damp cloth to remove dust—this helps the color sit evenly and makes the new piece blend naturally.
4. Repair a Stiff or Jammed Spring
A stiff or sticky spring can often be restored with careful adjustments. Clean the spring area with a soft brush or compressed air to remove debris. Inspect for bent coils and gently straighten them with needle-nose pliers if possible. Apply a tiny drop of silicone-based lubricant to restore smooth wobbling—avoid oil-based products, which may attract dust.
If the spring is broken or too weak, it can be replaced with a similar gauge spring inserted between the head and body to maintain proper wobble. Test gently after each adjustment to ensure the movement is smooth without forcing it, which could damage other parts.
5. Painting and Finishing
After completing structural repairs:
•Lightly sand rough edges to ensure a smooth finish.
•Paint with matching acrylic colors to conceal repairs.
•Optionally, apply a clear varnish to protect the surface and match the original finish.
For detailed areas, use a fine-tipped brush for precision. This ensures your bobblehead looks polished and complete, as if it were never damaged.
6. Prevent Future Damage
Protect your bobblehead by placing it on stable, padded surfaces, away from edges or high-traffic areas. When moving it frequently, store it in a padded box to minimize accidental falls.
Consider designating a specific shelf or display area for your bobbleheads. Proper positioning and gentle handling can greatly extend their lifespan, keeping them looking pristine for years.

Quick Reference for Common Repairs
|
Problem |
Recommended Fix |
| Small chip or broken part | 502 super glue or epoxy putty, sand, paint |
| Missing piece | Sculpt with clay or epoxy, cure, sand, paint |
| Stiff or sticky spring | Clean, straighten coils, lubricate |
| Cosmetic finish | Sand, paint, varnish to blend |
Final Thoughts
Repairing a Bobbleheadcraft polymer clay bobblehead is easier than it seems. Most minor damages can be quickly fixed with 502 super glue, while epoxy putty is optional for larger gaps or missing parts. Stiff springs can be cleaned, adjusted, and lightly lubricated to restore proper wobble.
With patience, a few household tools, and a little creativity, you can restore your bobblehead to its former charm. Don’t forget to check out our short video tutorials on YouTube for additional guidance. By following these tips—and possibly inventing your own clever fixes—your bobblehead will continue to bring joy and wobble for years to come. Browse our best-selling bobbleheads for more inspiration.


